↓ Scroll ↓
Mar 13, 2026
Discover how to sanitize makeup with easy, at-home steps for brushes, powders, and lipsticks - protect hygiene and improve performance in 2026.

Learning how to sanitize makeup is the definitive mark of a sophisticated beauty regimen. This essential practice involves the precise application of a 70% isopropyl alcohol solution for hard surfaces and products, complemented by bespoke cleansers for your artisanal brushes and tools.
Elevate this process from a mere task to a mindful ritual—a deliberate act of self-care that safeguards your skin's health and preserves the integrity of your most treasured cosmetic investments.
Why Sanitizing Your Makeup Is an Essential Act of Self-Care
A truly luxurious beauty ritual is grounded in impeccable practices. Sanitizing your makeup and tools is a quiet act of devotion that protects both your luxury products and, more critically, your skin’s vitality. This habit is inspired by the meticulous standards of elite makeup artists, who understand that flawless application begins with a pure canvas.
Each time a brush or sponge graces your skin, it gathers natural oils, delicate skin cells, and environmental bacteria. When that tool returns to your makeup, it introduces these contaminants directly into your cherished products. Over time, this can cultivate an environment where bacteria flourish, leading to everything from frustrating acne and irritation to more serious skin infections, compromising your complexion.
A Deeper Look at "Clean"
To master the art of how to sanitize makeup, it is vital to understand the difference between sanitizing and cleaning. Cleaning simply removes visible surface-level impurities. Sanitizing, however, is the crucial process that reduces bacteria to a safe, insignificant level—an indispensable step for anything that comes into contact with your face.
A pristine beauty routine is foundational for flawless skin. Sanitizing your tools and products prevents the transfer of bacteria, ensuring every application is as fresh and pure as the first.
This discerning approach to beauty is becoming increasingly prevalent among those who value cosmetic excellence. The global market for makeup brush cleaners, valued at approximately USD 150 million in 2022, is projected to ascend to nearly USD 300 million by 2032. This surge demonstrates a collective shift towards not just what we apply to our skin, but the immaculate precision with which we apply it.
Ultimately, integrating sanitation into your regular routine transforms the simple act of applying makeup into a moment of intentional luxury. It also ensures that the restorative benefits of your skincare, like our bespoke facials, are not compromised by unclean tools. It’s a small commitment that yields a visibly profound difference.
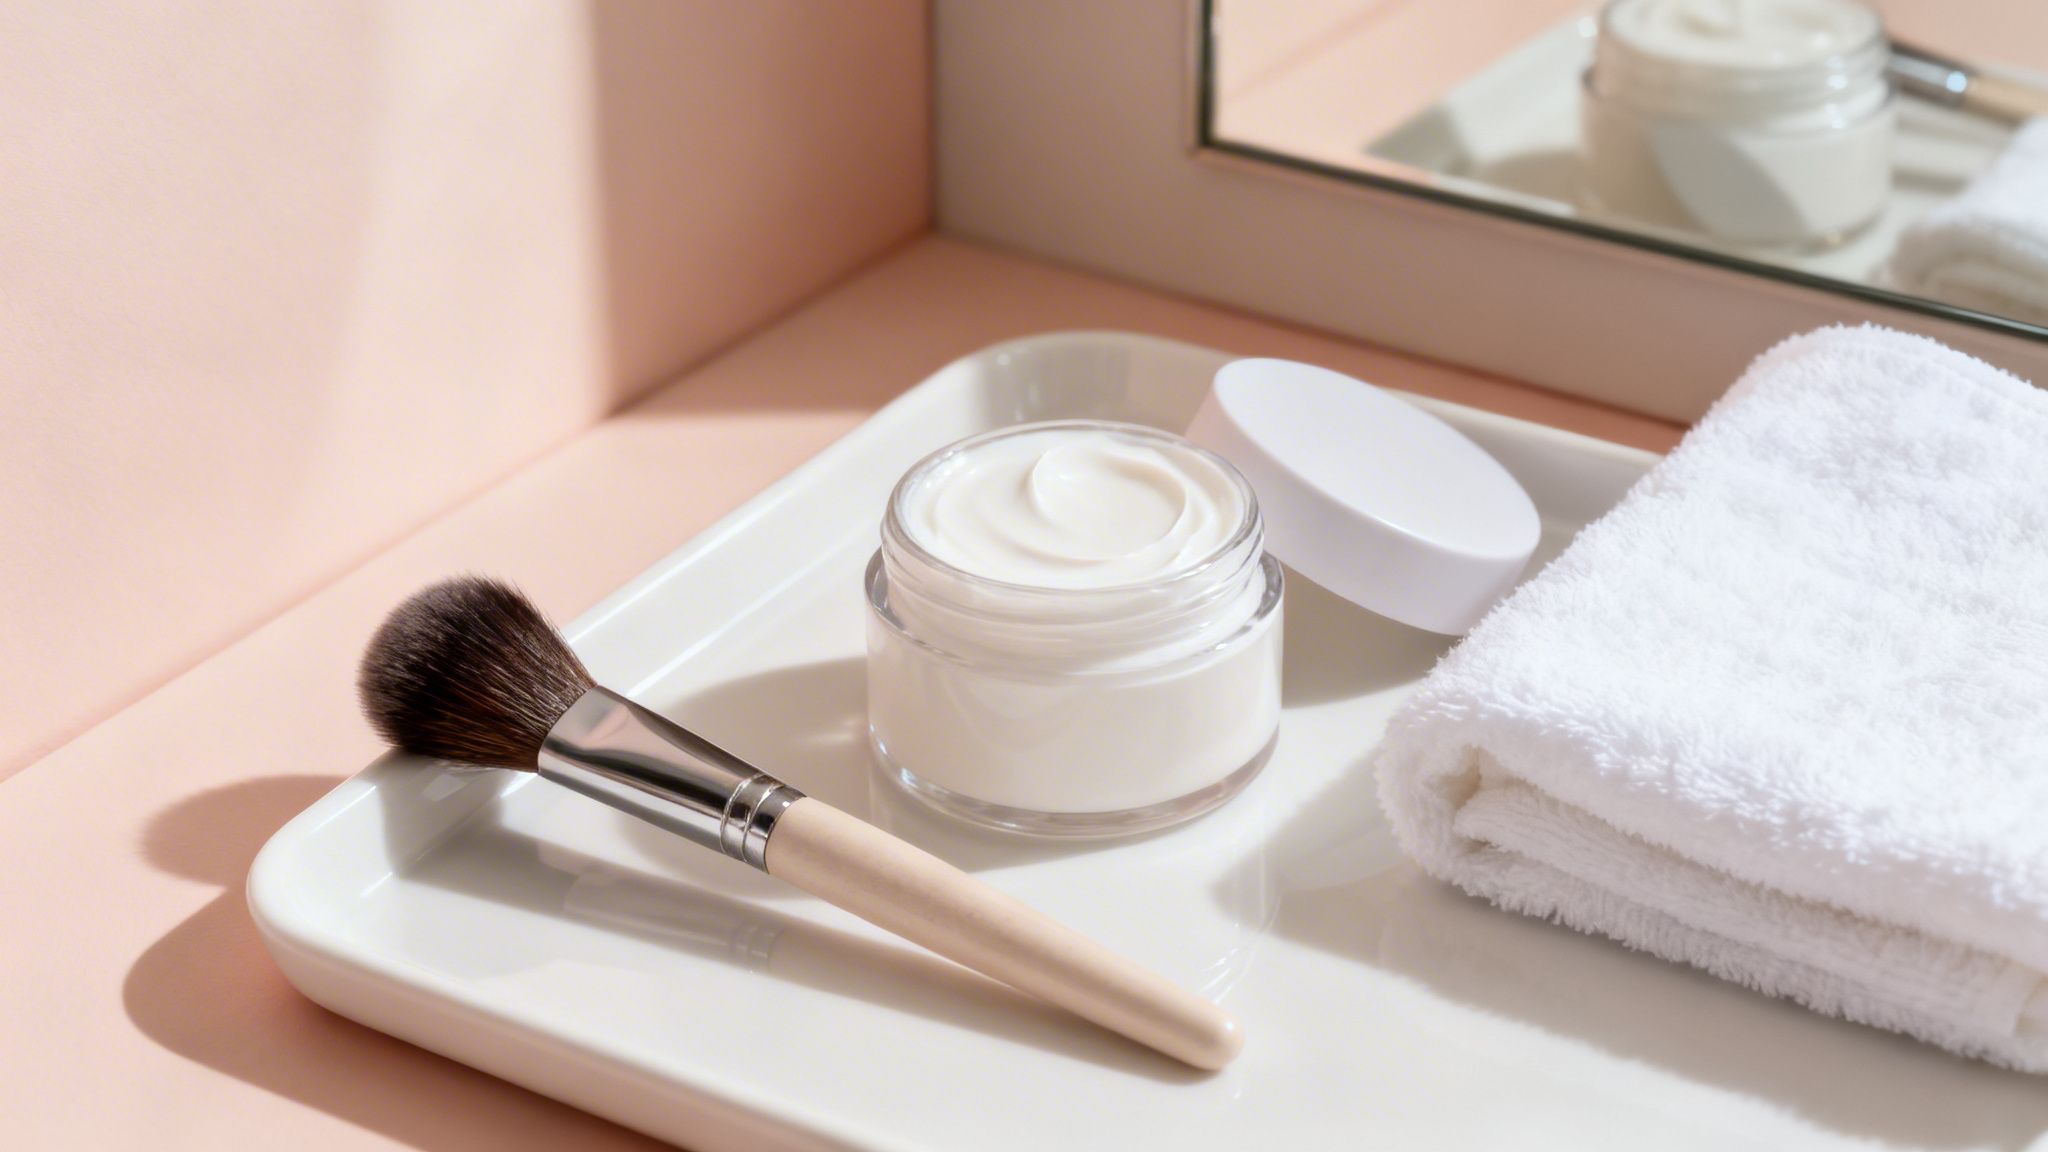
Your Essential Toolkit for Immaculate Makeup Hygiene
Before you begin this elegant ritual, it is wise to assemble a few key items. Having the proper instruments on hand transforms the process from a mundane task into a sophisticated act of self-care. This is your dedicated arsenal for maintaining the pristine condition of your products and, by extension, your skin.
The cornerstone of your sanitation kit is 70% isopropyl alcohol. This specific concentration is the gold standard used by professionals for its unparalleled efficacy. The inclusion of water allows it to penetrate and dissolve bacterial cell walls before the alcohol evaporates, guaranteeing a truly sanitized state. I always maintain a bottle with a fine-mist atomizer for delicately spritzing over palettes and purifying tool handles.
Building Your Cleansing Kit
Beyond alcohol, a few other essentials will empower you to care for diverse products and tools with the utmost precision.
A Gentle Brush Cleanser: Select a cleanser formulated exclusively for makeup brushes. These are designed to dissolve stubborn oils, waxes, and pigments without desiccating or damaging the delicate bristles, whether natural or synthetic.
Makeup Sanitizing Mist: For a swift refresh between deep cleanses, a pre-formulated sanitizing mist is ideal. These are engineered to be safely spritzed onto pressed powders and cream products without altering their luxurious texture.
Lint-Free Cloths or Wipes: This is a minor detail that imparts a major impact. Utilizing a material that will not shed fibers ensures you are not reintroducing dust or lint onto your freshly purified makeup.
Having the right tools ready transforms a routine task into a more mindful practice. It allows you to sanitize your collection with the care and precision of a seasoned aesthetician.
For a more advanced atelier, you can explore specialized essential makeup hygiene tools that bring a professional touch to your at-home routine. This is akin to how we elevate at-home skincare by incorporating pro-level treatments, like our https://www.unwindheadspa.com/dermaflash-enhancement service. With these simple items in place, you are poised to uphold the highest standards for your beauty collection.
The Art of Sanitizing Brushes and Sponges
Your makeup brushes and sponges are the trusted workhorses of your beauty collection. These are the very instruments you rely upon daily to blend, buff, and sculpt. To grant them a proper deep cleanse is not merely about extending their lifespan; it is an uncompromising step toward achieving healthy skin and a flawless makeup application.
This is no longer a niche concern. As more of us embrace daily makeup artistry, the dialogue around hygiene has intensified. The makeup remover market, valued at USD 1.86 billion in 2022, is projected to reach an impressive USD 3.19 billion by 2031. This signals a monumental shift toward understanding the importance of a pure foundation—not just for our skin, but for our tools as well. You can read more about this growing market trend and its implications for our daily rituals.
Let's explore the proper method for sanitizing your brushes and sponges, transforming a chore into a restorative practice.
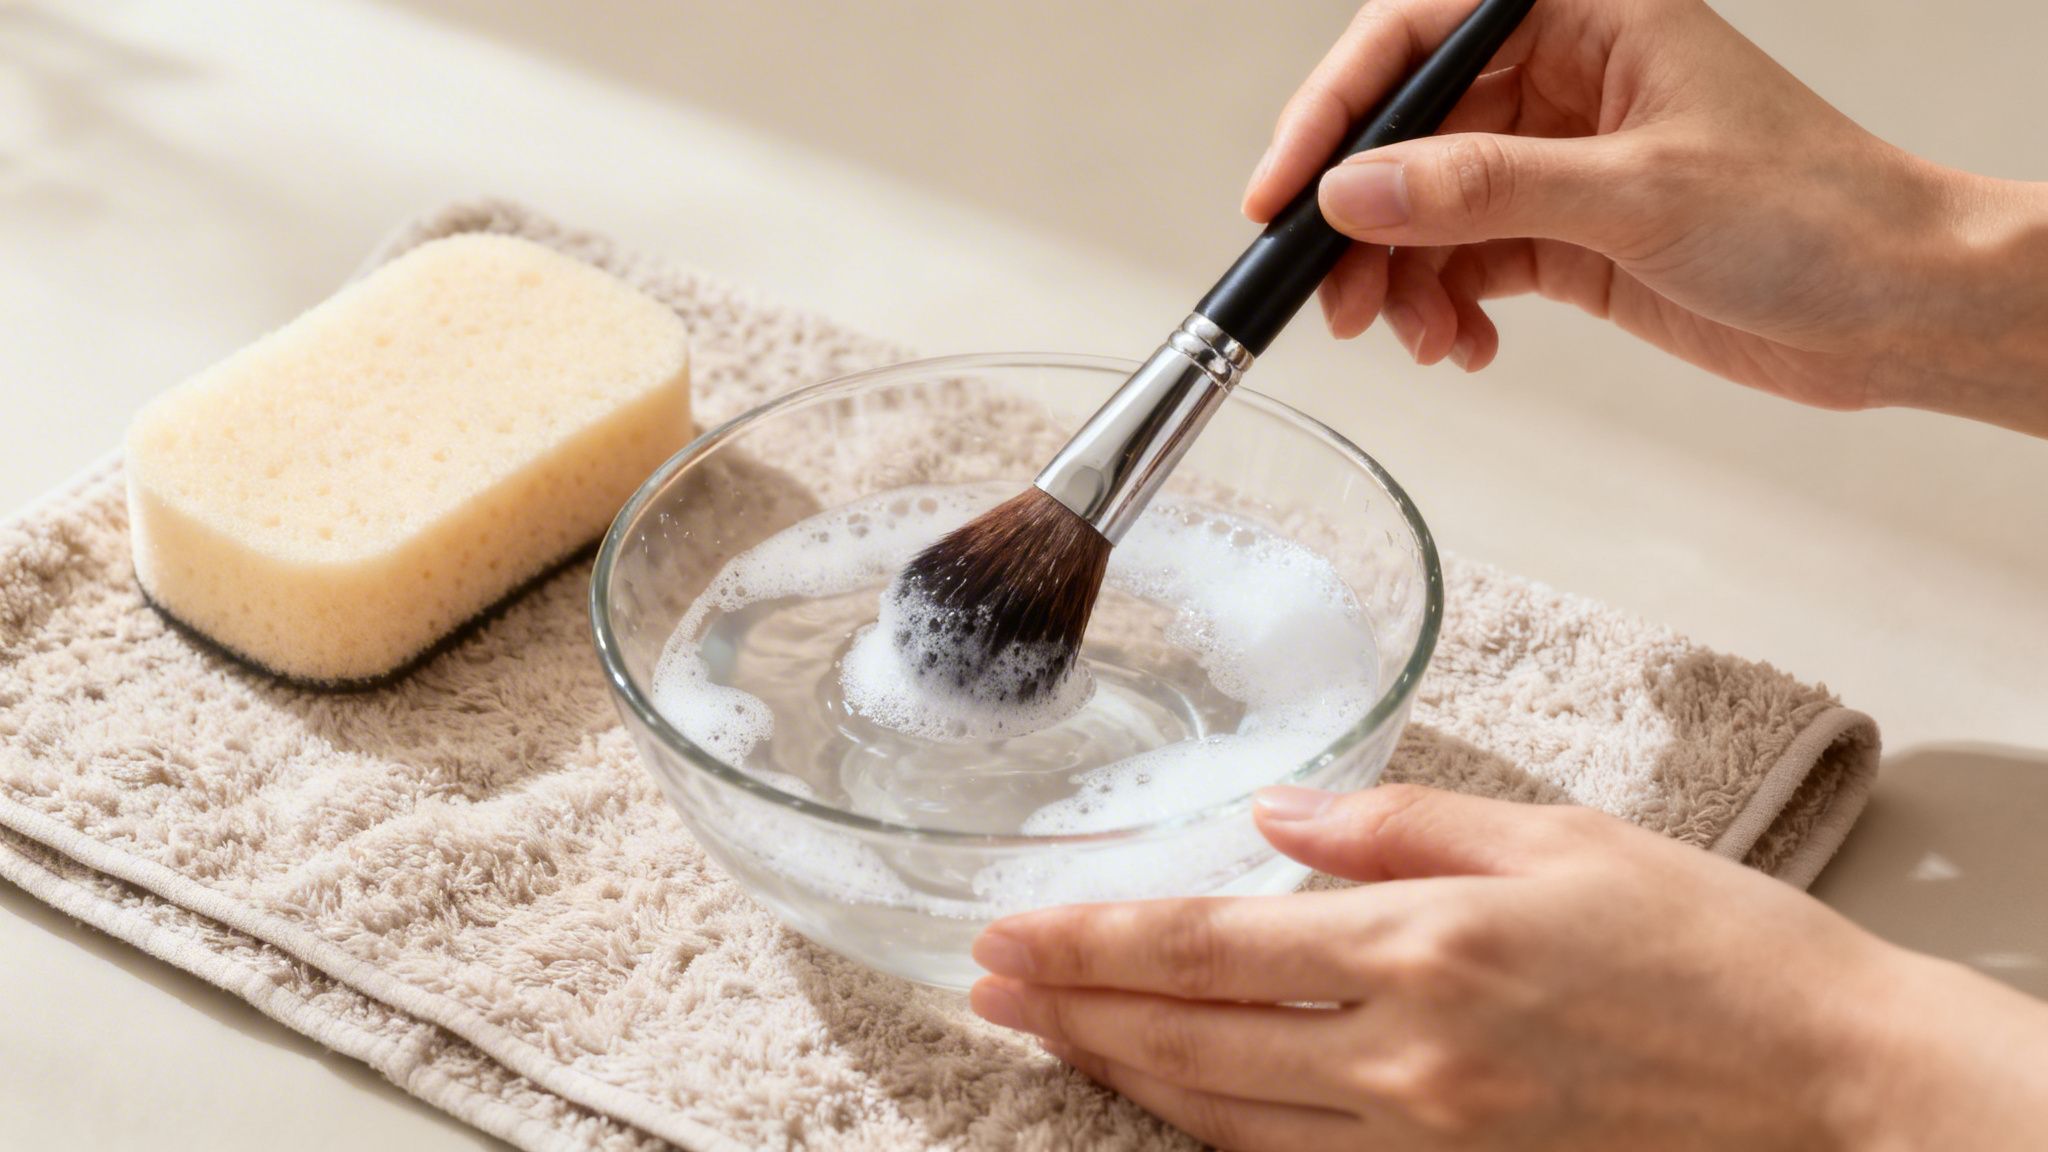
The Double Cleanse Method For Brushes
For your brushes, a cursory swirl under running water is simply insufficient. To achieve a truly purified state, I endorse the double cleanse method. This technique, borrowed from advanced skincare, ensures every last trace of pigment and oil is meticulously removed.
First, you must dissolve the makeup. Begin with an oil-based cleanser or a gentle, high-quality soap bar. This initial step is engineered to melt away tenacious products like foundation, cream blush, and concealer. I find this approach remarkably effective without being harsh, particularly on my precious natural-hair brushes.
Moisten the bristles and gently massage the cleanser in with your fingertips. Crucially, always maintain the brush head in a downward orientation. If water seeps into the ferrule (the metal band), it can dissolve the adhesive over time, ruining your most cherished brush.
The first cleanse dissolves makeup and oil. The second wash disinfects. This two-step process is the secret to getting your brushes truly clean, so they feel soft and apply makeup smoothly every time.
After rinsing away the first cleanse, proceed to the second wash. This is your disinfection step. Employ a dedicated brush shampoo or a small amount of baby shampoo. Lather, then rinse thoroughly until the water runs clear. Gently press out excess water with a clean, plush towel.
To dry, reshape the bristles with your fingers and lay them flat on a towel, allowing the brush heads to hang just over the edge of a counter. This facilitates complete air circulation, preventing mildew and helping them dry back into their perfect, original form.
The Right Way To Clean Your Sponges
Makeup sponges present a unique challenge. Their porous nature can turn them into a veritable petri dish for bacteria if not cleansed frequently and correctly. The objective here is to penetrate deep within the sponge to eradicate every trace of makeup.
First, you must completely saturate the sponge. Run it under warm water, squeezing repeatedly until it expands to its full, supple size.
Next, work in your cleanser. I favor using a solid cleanser directly on stained areas, though a premium liquid soap is also effective. Squeeze and massage the sponge repeatedly to build a rich lather. You will literally see the foundation being lifted from its core.
Continue rinsing and squeezing under running water until it runs perfectly clear—the sign that all makeup and soap have been purged. Be gentle; twisting or wringing your sponge too aggressively can easily cause it to tear.
Once purified, find a well-ventilated area for it to air-dry. A small, dedicated stand is perfect, but a clean, dry surface will suffice. Proper airflow is paramount to preventing mold and ensuring your sponge is fresh and hygienic for your next application.
A Quick Guide To Tool Cleaning Frequency
Maintaining a consistent cleaning schedule can feel daunting. To simplify, here is the elegant guide I adhere to for keeping my tools in pristine condition.
Tool Type | Recommended Cleaning Frequency | Sanitization Method |
|---|---|---|
Foundation & Concealer Brushes/Sponges | After every use, or at least 1-2 times per week | Deep clean with soap/cleanser |
Powder, Blush & Bronzer Brushes | Once a week | Deep clean with soap/cleanser |
Eyeshadow & Eyeliner Brushes | 2-3 times per week, or after each use for creams | Deep clean with soap/cleanser |
Lip Brushes | After every use | Deep clean with soap/cleanser |
Tool Handles & Packaging | Once a week | Wipe down with 70% isopropyl alcohol |
Following a disciplined schedule like this not only shields your skin from breakouts and irritation but also enhances the performance of your products and extends the life of your beloved tools.
Caring for Your Powders, Creams, and Lipsticks
While purifying your brushes is a commendable first step, what of the makeup itself? Mastering how to sanitize makeup products is what truly elevates your beauty ritual, ensuring every application feels pure, fresh, and utterly safe for your skin.
This refined touch protects your treasured cosmetics from bacteria transferred by fingers, brushes, or mere air exposure. The technique varies slightly by product, but each method is simple and will not compromise the beautiful texture or pigment you adore.
How to Sanitize Pressed Powders
You are likely familiar with the frustrating, shiny film that can form on a beloved eyeshadow or blush. This is hardpan, a result of skin oils transferring from your brush to the powder, sealing the surface. Sanitizing not only eliminates germs but can also resurrect your powders to their original glory.
The premier method for this is a "spray and sweep."
First, gently scrape away the top layer using a clean spatula or the edge of a butter knife. This removes any visible hardpan and prepares the surface.
Next, take a spray bottle of 70% isopropyl alcohol and hold it approximately six inches away. Bestow a light, even mist upon the powder—just enough to dampen it without saturation.
Allow it to air dry completely. The alcohol will evaporate within moments, leaving a perfectly sanitized powder with no residual trace. It is a simple ritual that guarantees you are always using a fresh, immaculate product.
A light mist of 70% isopropyl alcohol is the professional secret to sanitizing pressed powders. It disinfects the surface in seconds and evaporates completely, preserving the product's texture and payoff.
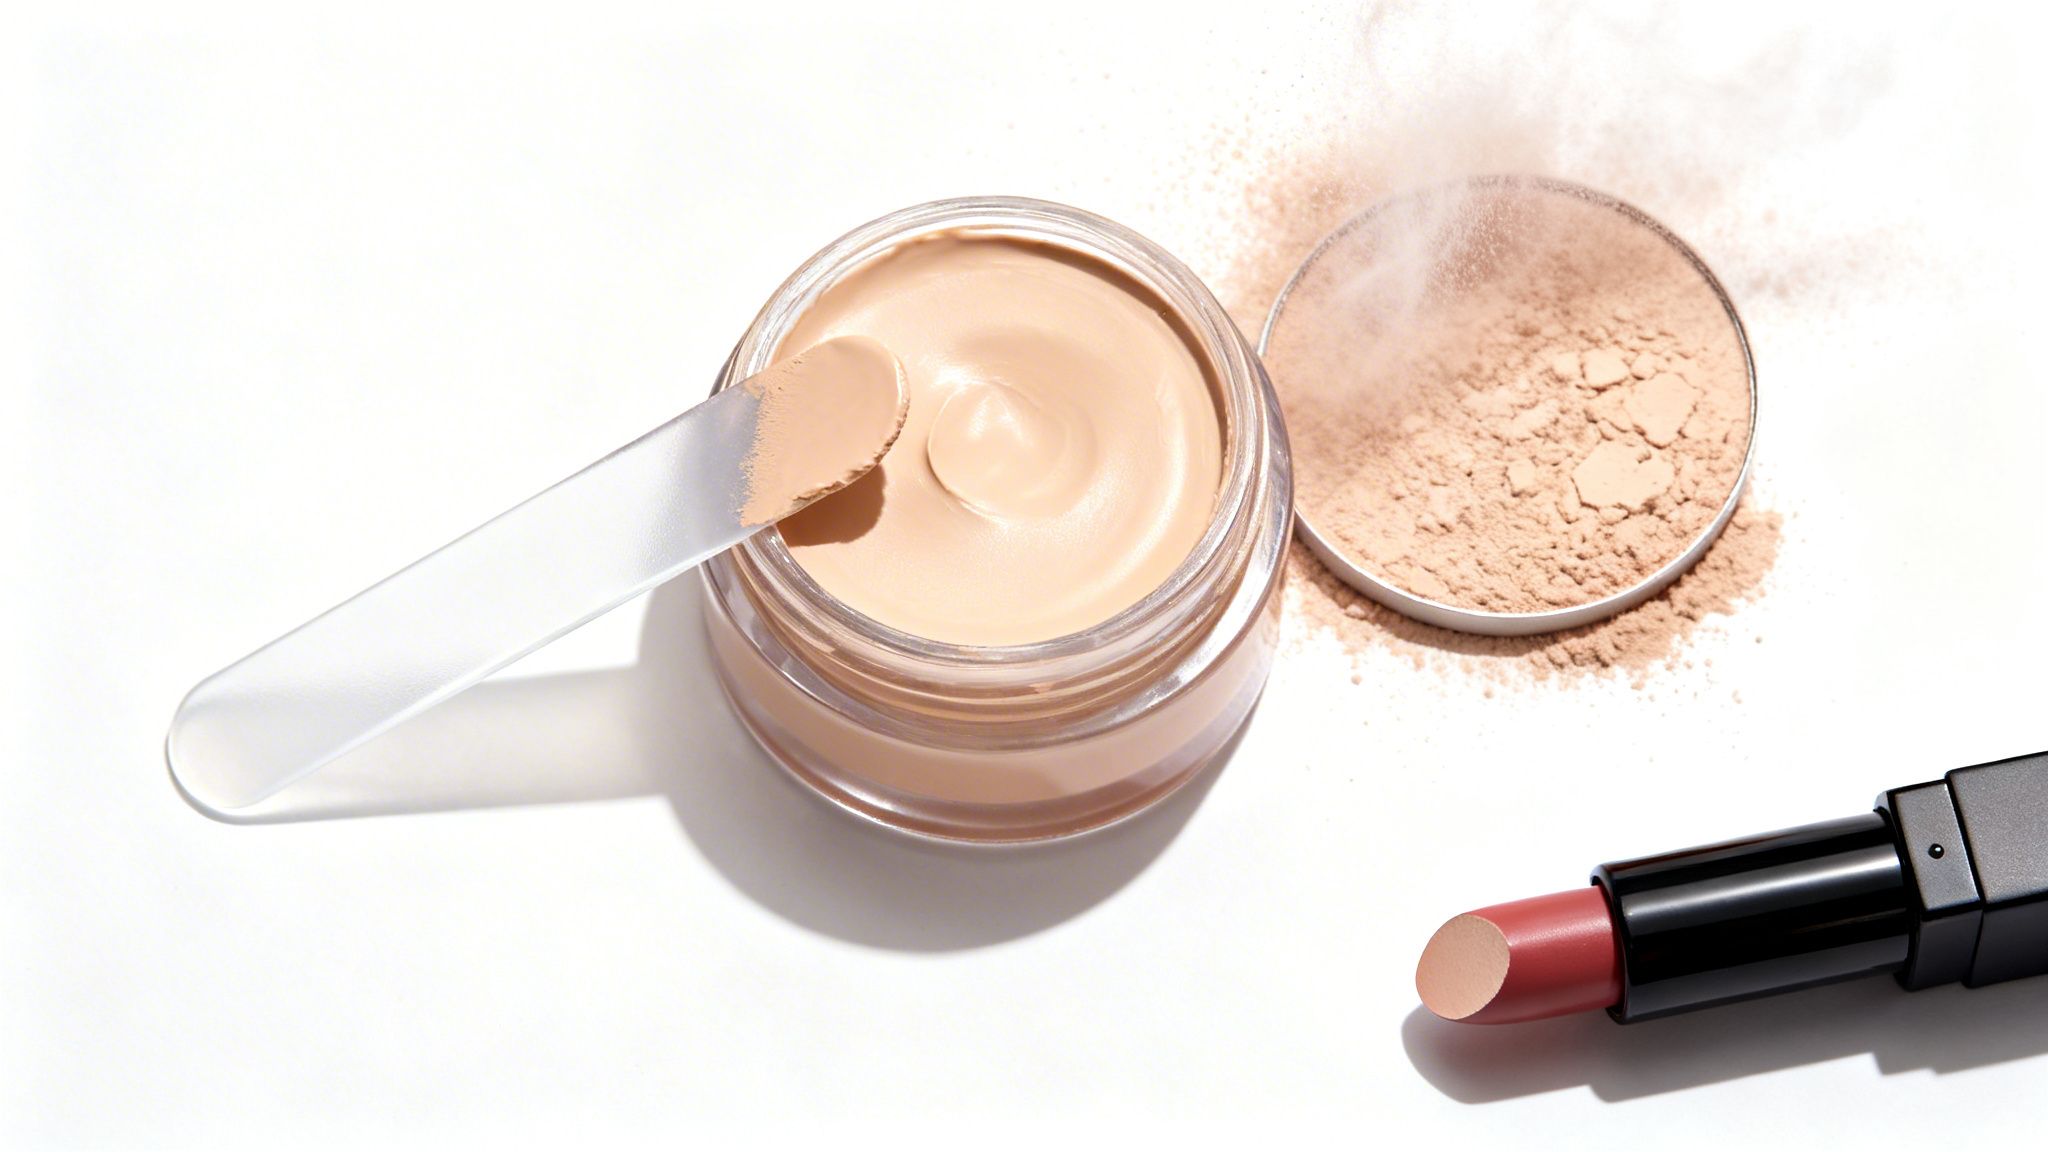
Freshening Up Cream Formulas
Cream foundations, blushes, and concealers demand a slightly different approach. Their rich, emollient nature can provide a hospitable environment for bacteria, particularly if you indulge in dipping your fingers directly into the pot. The secret here lies in preventing contamination from the outset.
Always use a clean metal spatula to decant a small amount of product for each use. Place it on a sterile makeup palette or the back of your sanitized hand. This elegant habit of "single-dipping" keeps the main product pristine.
If you suspect the surface has been compromised, there is no need to discard it. Simply use your clean spatula to gently scrape off the top layer and dispose of it. You can also wipe the container's inner rim with a touch of alcohol on a cloth to maintain absolute freshness.
The Art of Sanitizing Lipstick
Your lipsticks see a great deal of use, and thus deserve the same thoughtful care. This is especially true after an illness or if you have shared a tube (a practice we generally advise against).
A truly beautiful pout begins with a clean, healthy canvas. This is why professional treatments that focus on lip health are so beneficial. You can learn more about these techniques by exploring how to get your perfect pout and enhancing lip therapy.
To maintain the hygiene of your lipsticks, adopt the "slice and dip" method used by professionals.
Slice: Gently shave off the very top layer of the lipstick bullet with a clean, sanitized knife. This removes the portion that has made contact with your lips.
Dip: Pour a small amount of 70% isopropyl alcohol into a small dish or bottle cap and submerge the lipstick tip for approximately 30 seconds.
Dry: Remove it and simply allow it to air dry. The alcohol performs its purifying magic and vanishes completely, leaving your lipstick immaculately clean and ready for its next elegant application.
Sanitizing Delicate Eye Makeup with Precision
The skin around our eyes is exceptionally delicate, so our approach to eye makeup hygiene must be commensurately thoughtful. Products like mascara and eyeliner are applied in close proximity to one of the most sensitive areas of the body, and maintaining their purity is paramount to preventing irritation or infection.
Let us begin with mascara. A mascara tube is dark and moist—an ideal environment for bacteria to thrive. This is precisely why the golden rule of makeup safety is to never, ever share your mascara. Each time you use the wand, you introduce new bacteria into the tube, where it can multiply.
Adhering to a strict three-month replacement schedule for your mascara is not merely a suggestion; it is one of the most critical actions you can take to protect your eye health.
Elevating Your Eyeliner Hygiene
For pencil eyeliners, keeping the tip pristine is surprisingly simple. The secret is to sharpen your pencil before every single use. This elegant action shaves away the old, exposed surface, revealing a fresh, clean point for a perfect and hygienic application.
To take this a step further, you can briefly dip the freshly sharpened tip into a bit of 70% isopropyl alcohol. Allow it to air-dry for just a few seconds before use. This swift sharpen-and-dip routine ensures your liner is beautifully clean every time.
A little industry secret for those with especially sensitive eyes is to use disposable mascara wands. This guarantees the wand is always sterile. It’s a practice many pros use, but you can easily adopt it at home for total peace of mind.
Best Practices for Liquid and Gel Liners
When it comes to learning how to sanitize makeup, liquid and gel liners have their own unique considerations. For liquid liners with a built-in brush, there is unfortunately no viable way to sanitize the product within the tube. Your best defense is to remain vigilant about its expiration date and replace it as recommended, typically every three to six months.
With gel eyeliners housed in a pot, the method mirrors that for other cream products. Always use a clean, dedicated eyeliner brush and avoid double-dipping. Instead, use a sanitized spatula (or the clean handle of your brush) to transfer a small amount of product onto a palette or the back of your hand.
If you suspect your pot may be contaminated, you can gently wipe the top surface with a lint-free tissue that has been lightly spritzed with alcohol. This will help restore its purity and keep your application fresh.
When to Refresh and When to Retire Your Collection
A truly luxurious beauty ritual extends beyond application—it involves curating a collection that is both beautiful and impeccably safe. This requires more than routine cleaning; it demands an intuitive understanding of each product's lifecycle, knowing when it has served its purpose and must be gracefully retired.
This mindful curation is part of a larger, conscious shift in the beauty world. The global clean beauty market is projected to grow from USD 8.02 billion in 2026 to USD 14.38 billion by 2035. This reflects a profound collective desire for purity and safety in cosmetics, reinforcing the importance of a clean and thoughtful routine. You can read more on this influential clean beauty trend to understand its growing impact.
Trust Your Senses Beyond the Label
While the Period After Opening (PAO) symbol—that small open jar icon—offers a helpful guideline, your own senses are your most reliable arbiter. A product can spoil long before its printed date if stored improperly or contaminated. Learning to recognize the subtle cues that signal it is time to part ways is a crucial skill for any connoisseur.
Pay close attention to these quiet indicators:
A Change in Scent: If a product begins to smell waxy, sour, or overly chemical, its formula has started to degrade.
An Altered Texture: A once-creamy foundation that is now separated, or a powder that has become hard and resists your brush, is no longer performing at its peak.
A Shift in Color: Has your signature nude lipstick taken on a darker or more orange tone? This is a clear signal of oxidation and spoilage.
A product's integrity is everything. If its scent, texture, or color has changed in any way, its time in your collection has ended. Discarding it is an act of respect for your skin's health.
The Lifecycles of Your Cosmetics
Understanding the general lifespan of different products helps you maintain a collection that is pristine, effective, and safe. Consider it a curated timeline, ensuring everything you use is fresh and performs beautifully.
A Quick Reference for Product Retirement
Product Category | Typical Lifespan (After Opening) | Key Retirement Signal |
|---|---|---|
Mascara & Liquid Eyeliner | 3 Months | This is a strict rule. Dryness or clumping are late-stage signs. |
Cream & Liquid Foundation | 6-12 Months | Watch for separation, color changes, or an "off" smell. |
Lipsticks & Lip Glosses | 1 Year | Any change in texture (waxy, hard) or scent means it's time to go. |
Powder Products (Blush, Eyeshadow) | 1-2 Years | While powders last longer, discard them if hardpan develops or the color payoff diminishes. |
This timeline is not merely about performance; it is about safety. As products age, their preservative systems weaken, creating a welcoming environment for bacteria to grow.
The Unbreakable Rule After an Infection
There is one instance where these timelines become irrelevant: if you have used any product while experiencing an infection.
Whether it was conjunctivitis (pink eye), a cold sore, or a skin infection, any makeup or tool that touched the affected area must be discarded immediately. This includes eye makeup, lipsticks, concealers, and the brushes used with them.
Attempting to sanitize these items is simply not worth the high risk of reinfection. This non-negotiable standard is the ultimate expression of a clean beauty philosophy, prioritizing your health above all else.
Your Makeup Sanitation Questions, Answered
As you begin to incorporate these practices into your routine, a few common questions often come up. Let’s walk through some of the finer points to ensure your beauty ritual feels as pure and intentional as it should.
Can I Use Hand Sanitizer to Clean My Makeup Brushes?
It’s a tempting shortcut, but one we strongly advise against. While hand sanitizers are great for your hands, they’re not formulated for your delicate brushes. Most contain emollients or moisturizers that leave behind a sticky film.
This residue can ruin a smooth makeup application and, worse, may lead to skin irritation. For a truly clean result, always turn to the professional standard: 70% isopropyl alcohol or a high-quality brush cleanser. They disinfect perfectly without leaving anything behind.
How Often Should I Sanitize My Makeup Bag?
Your makeup bag is a space that deserves just as much attention as your tools. It can easily become a hotspot for bacteria, so we recommend giving it a thorough cleaning at least once a month. Think of it as creating a pristine home for your cherished products.
How you clean it depends on the material:
Fabric bags can often be placed in the washing machine on a gentle cycle.
For plastic or vegan leather bags, a simple wipe-down is all you need. Just spray a soft cloth with 70% isopropyl alcohol and carefully clean the interior and exterior.
A note on UV light: While modern UV-C wands can be useful for hard surfaces like compacts, they aren’t a substitute for physical cleaning. The light can’t penetrate into the dense bristles of a brush or the porous texture of a powder, making alcohol or a proper cleanser the most reliable method for deep sanitation.
Is It Safe to Sanitize Makeup with a UV Light Wand?
UV-C light wands have become a popular tool, but their role in makeup sanitation is specific. They work wonderfully for disinfecting hard, non-porous surfaces—think the outside of a lipstick tube, a palette mirror, or your tweezers.
However, when it comes to the makeup itself, their effectiveness is limited. True sanitation for your powders, creams, and brushes requires a physical cleaning method that can reach every nook and cranny. For that, nothing beats the methods we’ve already covered.
At Unwind Head Spa, we believe true luxury lies in meticulous care and pristine rituals. Extend this philosophy of wellness to your scalp and hair by booking a deeply restorative treatment with us. Experience immaculate, personalized care at https://www.unwindheadspa.com.
